
Create a test track
Before you go adventuring, let's do a short orientation trip first.
Things to know before you head outside
We know you'll be itching to go outside and capture some experiences in your region. To ensure you have no technical hiccups while you're out in the field, let's start with a walk around the block and do an end-to-end test first.
Here are a few things you can do at your desk right now to familiarise yourself with the App. Once outside, you can put all of these into practice.
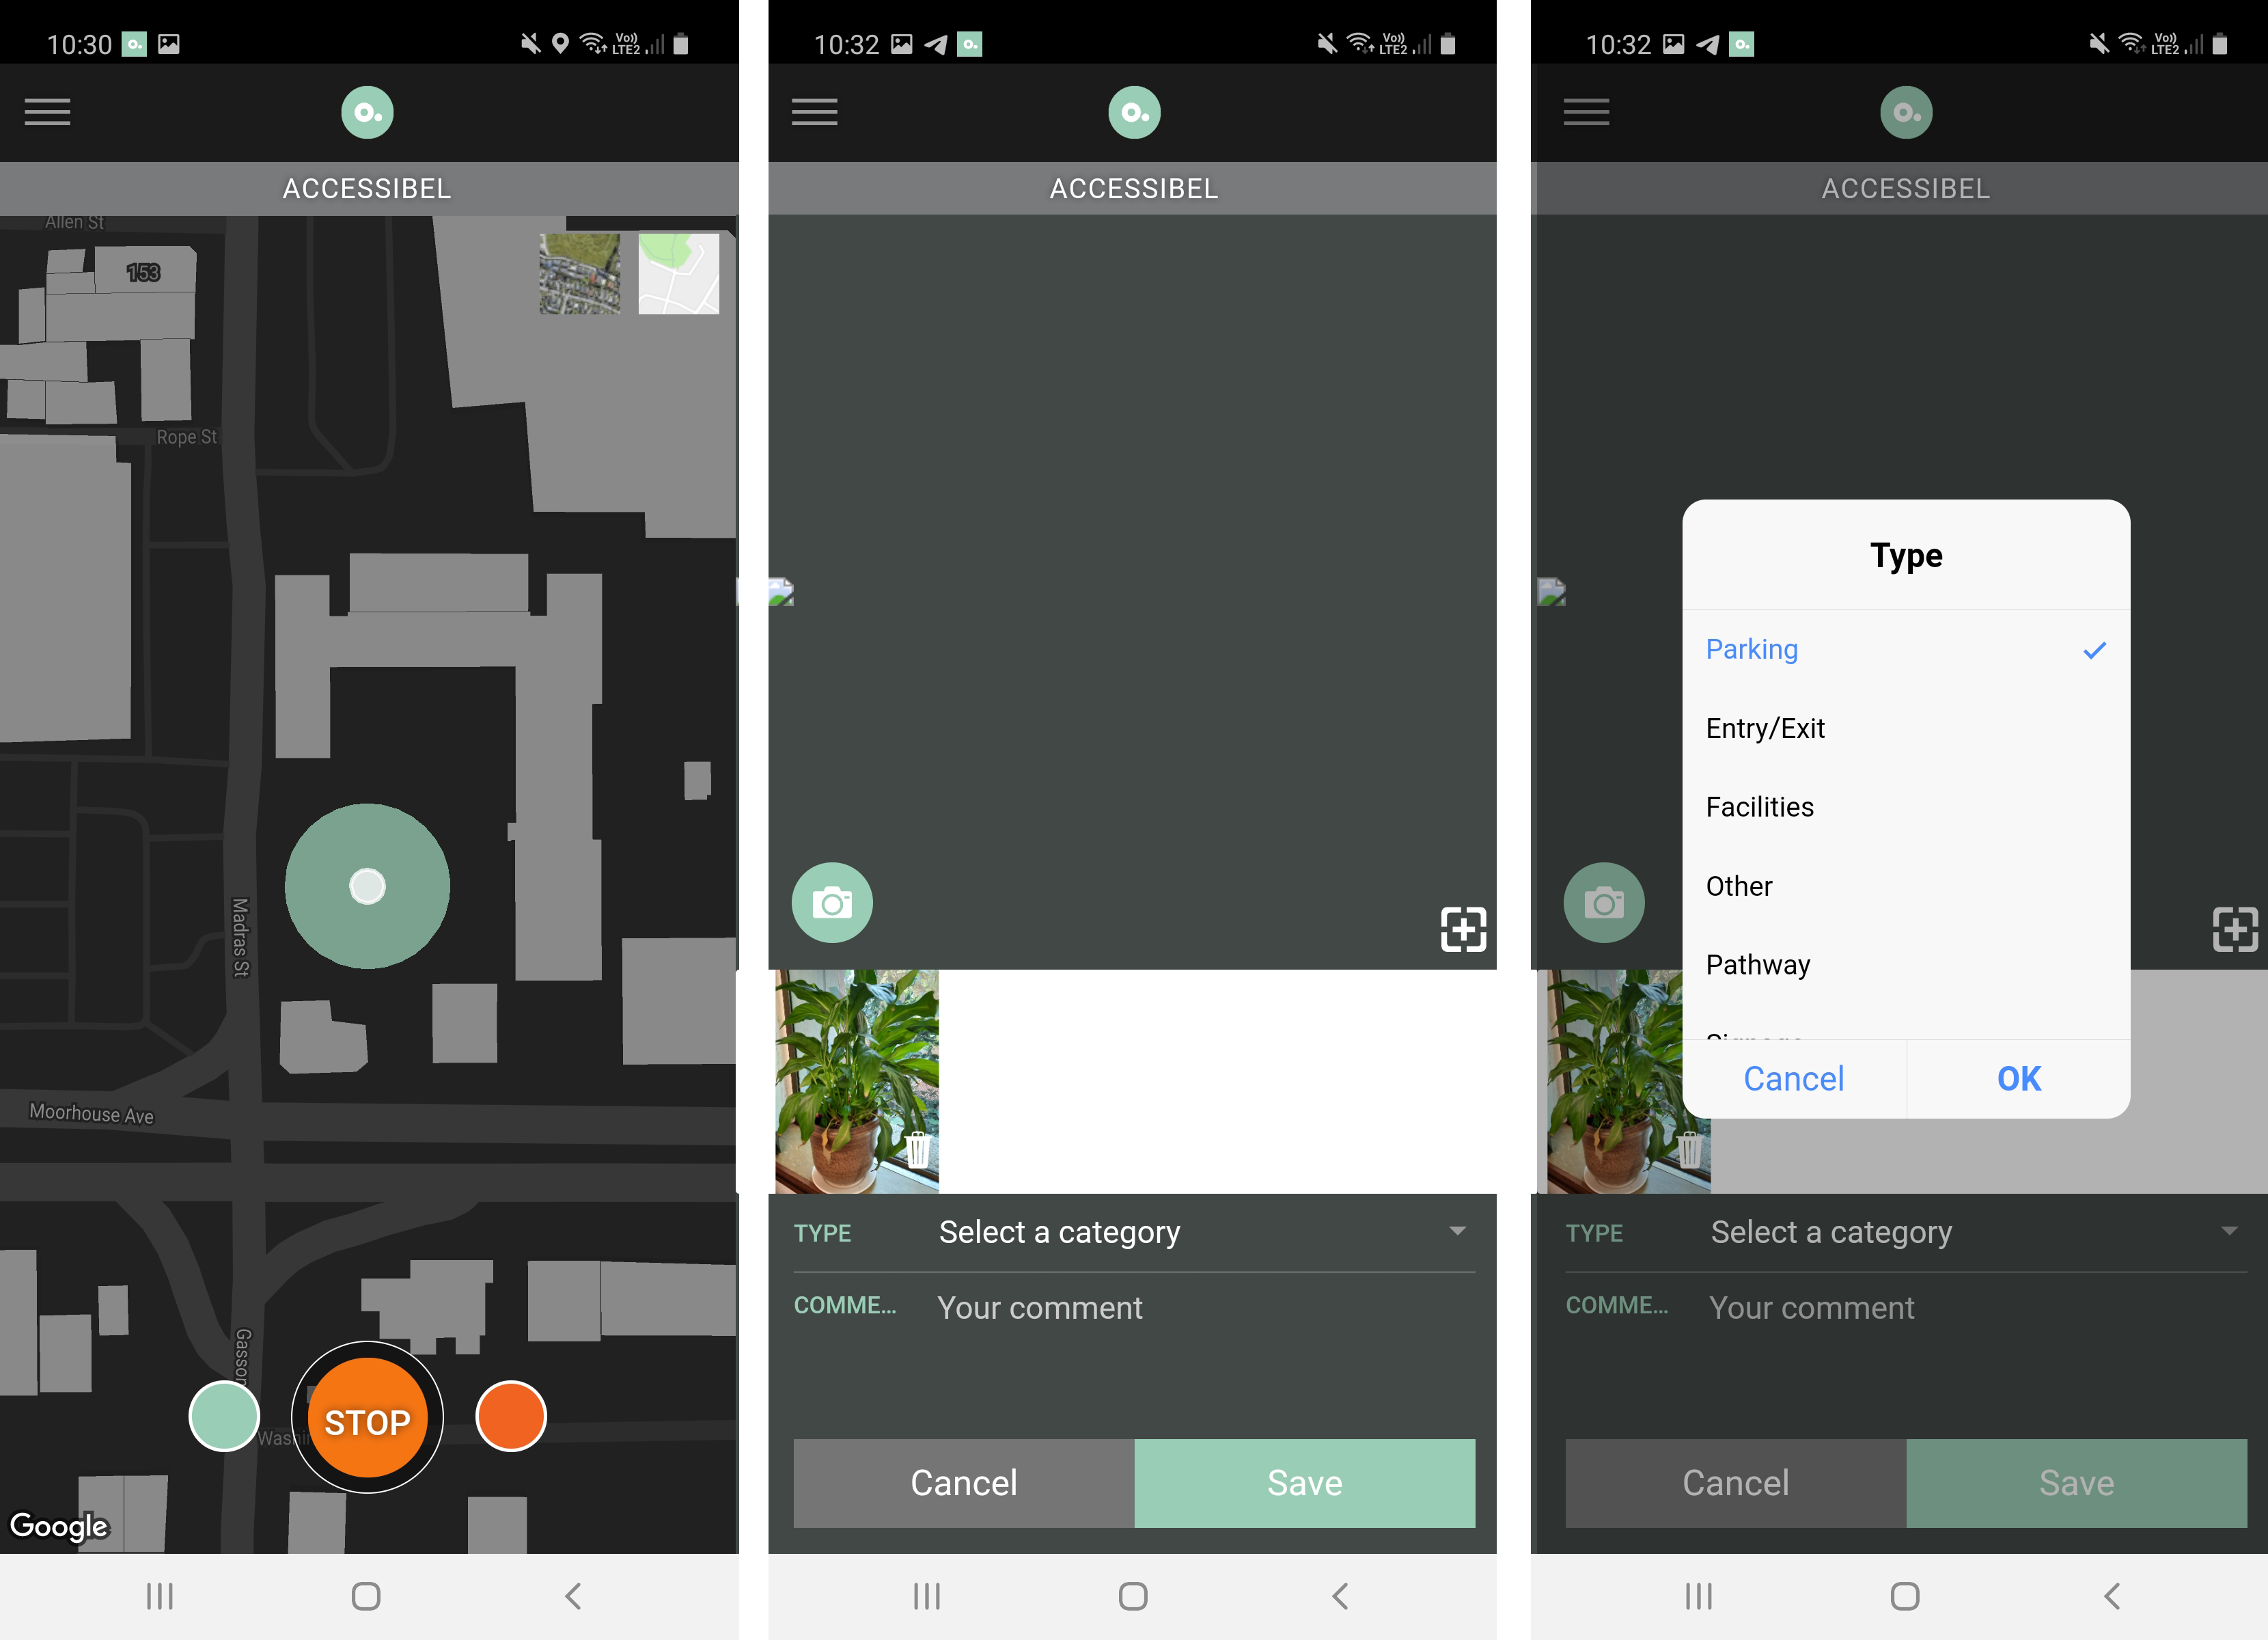
Start a track and drop a point
The basic function of the App is to track your journey and allow you to drop points-of-interest (POIs) and add a photo, category and comment.
At your desk, work through the steps below:
- Start a journey
- Drop a green (ok) or orange (concern) point of interest
- Tap on the point to bring up the information panel
- Click the camera icon to add a photo
- Add a category and caption
- Save the information
- Stop the journey and enter in a title (e.g. 'test' - we can delete it later)
That's all there is to it.
Now to do this while on the move...
A short walk around the block
Now, head outside and go for a short walk. Be careful not to look at your phone the whole way – watch where you're going, and look out for those points of interest!
GPS Accuracy
When moving a green journey line will appear showing your path. The accuracy of this line is 100% dependent on the quality of your GPS connection.
When the GPS signal is weak the green halo around your location point will be wide, when its strong it will be tight or non-existent. Think of your journey line as a reference of your movement, plus an indicator of GPS Strength. It exists as a guide to plot a clean track path when it comes to moderating and editing the track.
Due to GPS inaccuracy, often some points of interest will not be in the exact spot. These can be fixed in the Moderation Tool.
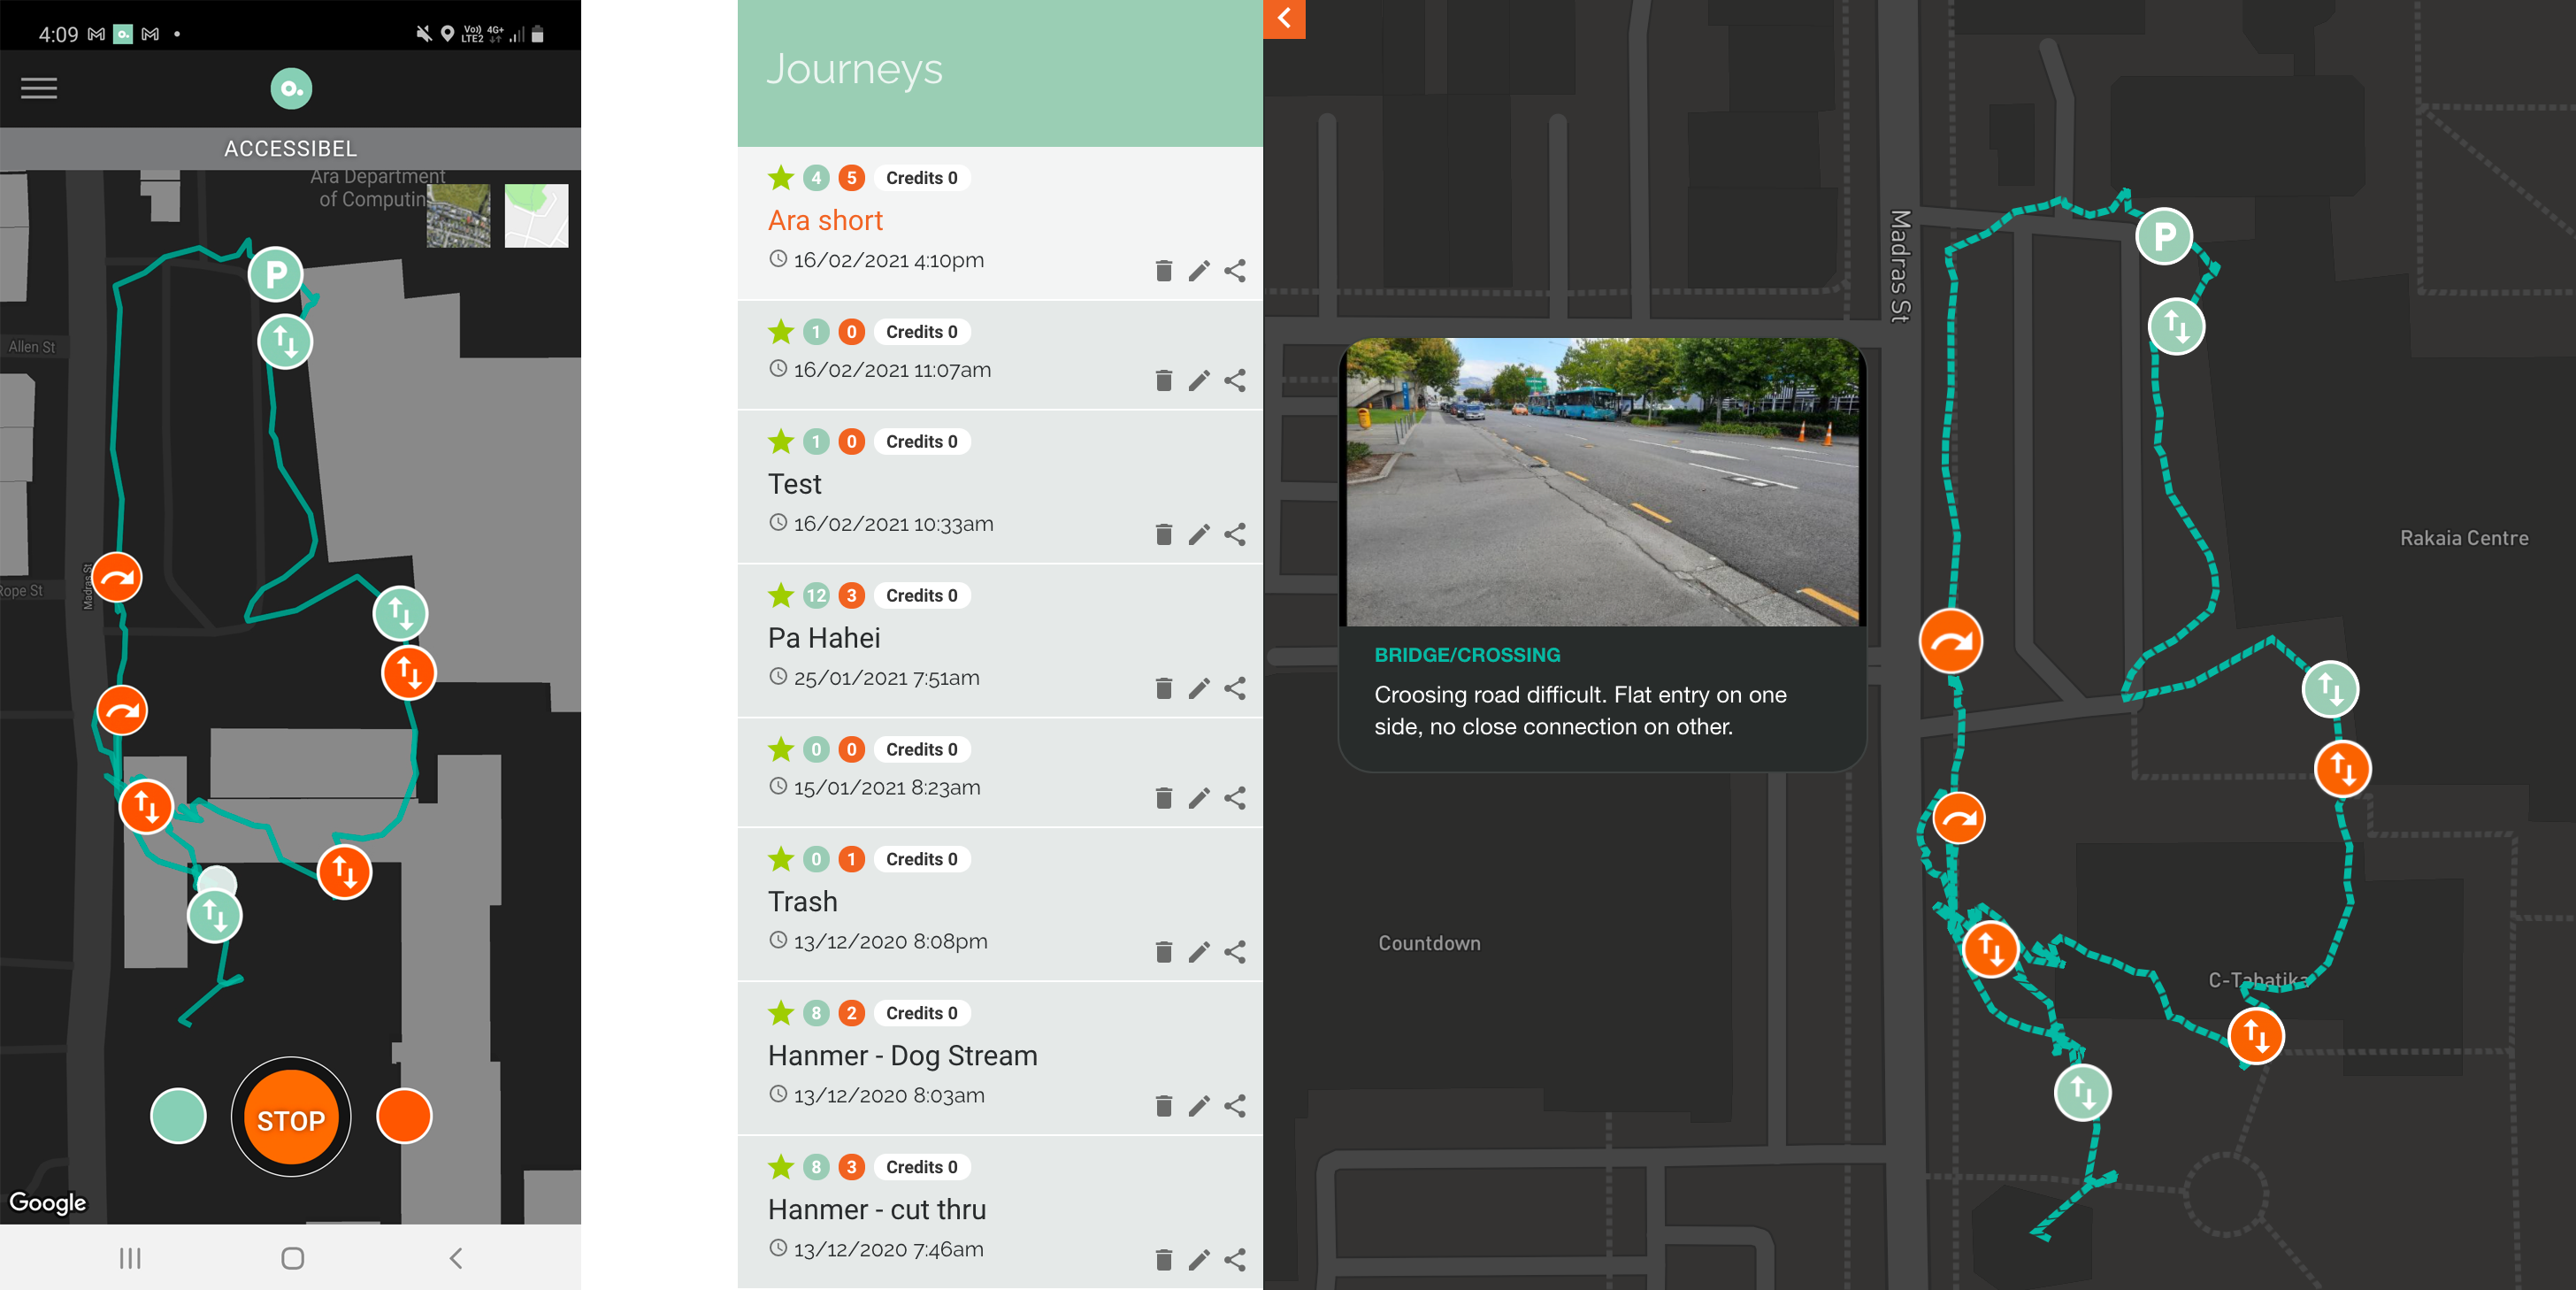
Track recorded in App (left) and reviewed in the Moderation tool (right).
Take multiple images
It is recommended to add multiple images to a specific point of interest to capture the various issues. These could include an establishing shot to show the lead up and surrounds, a close up of the pathway surface, any other functional issues like doors or handrails. Aim to create a full picture of the issues or benefits that may not be easily expressed in writing.
For more details about capturing and documenting go to the Accessibel Profiling Methodology section.
Comments - only add the basics
To reduce time, it's a good idea to capture basic comments with the view to craft further during the moderation phase. When moderating, you will have the image available to expand on the description. It will be far more efficient than typing a short story on a phone.